From gazebo to sauna: my own build
The sauna behind this site — an unused garden gazebo in Derbyshire, converted by Irony Fireside over about two weeks, now used four or five times a week.
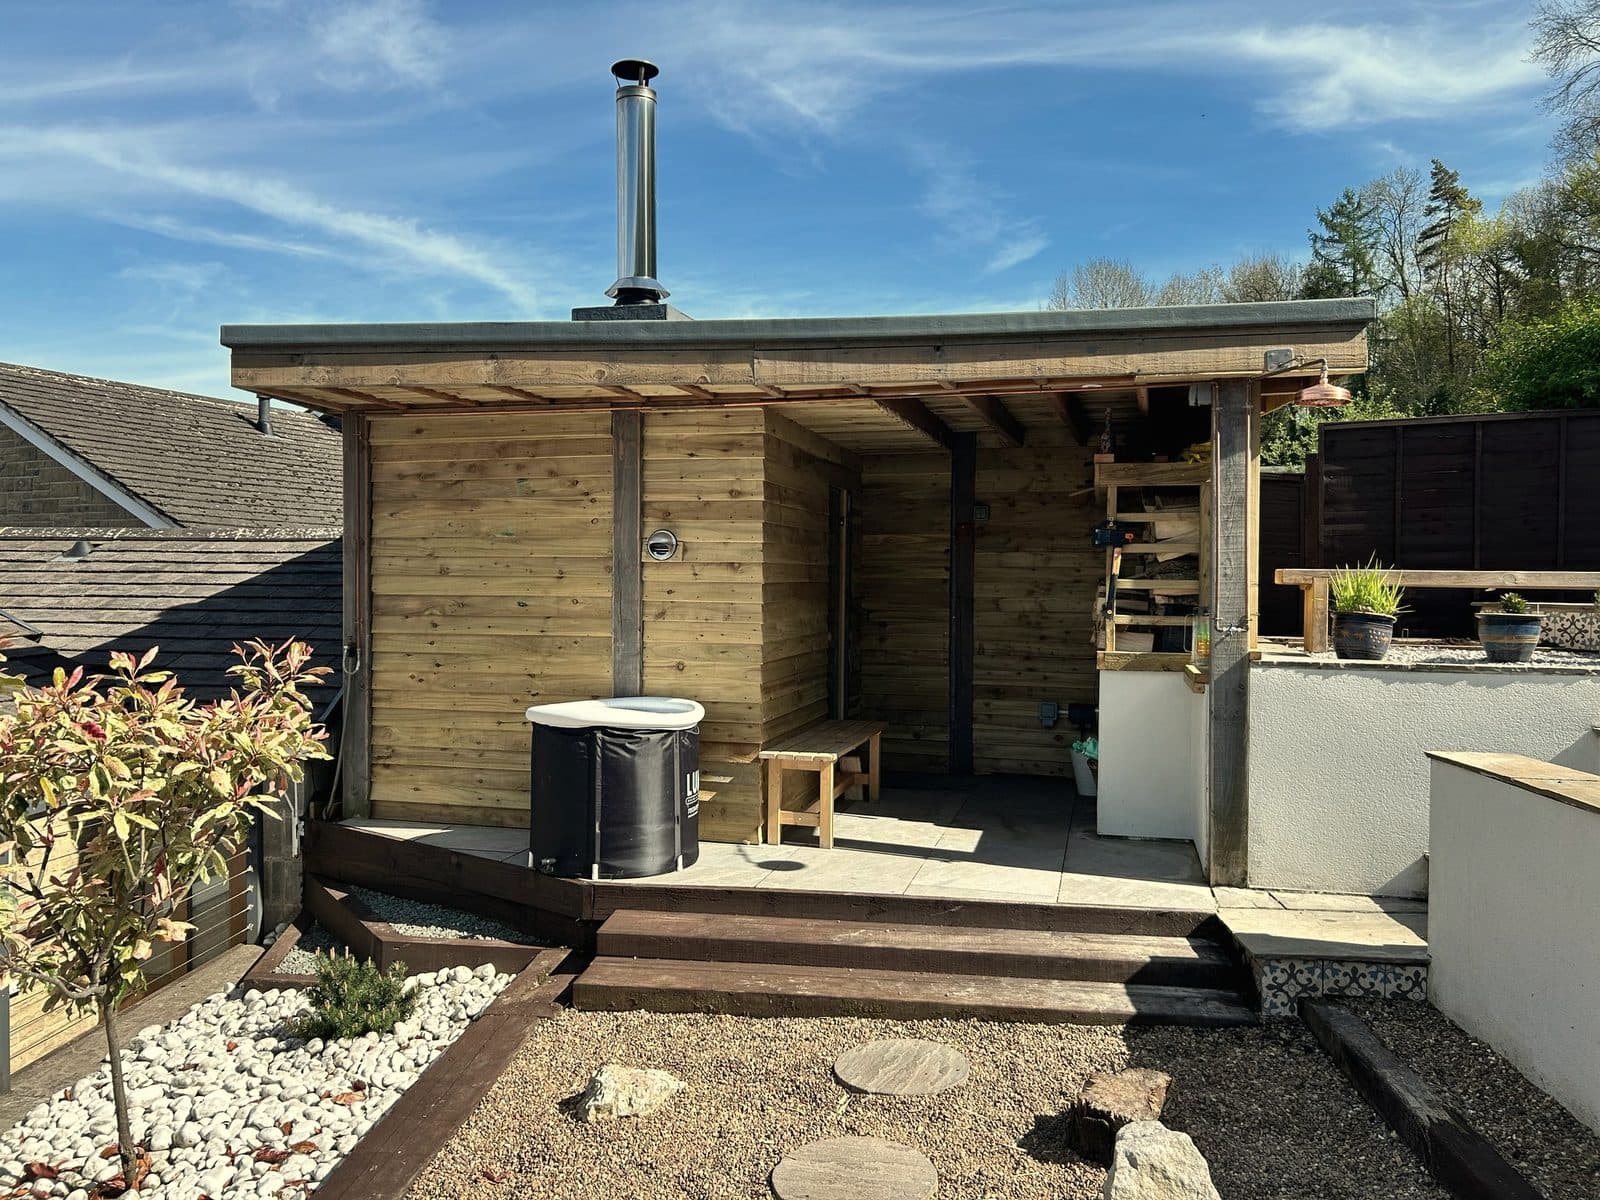
For about two years, a friend and I drove twenty minutes to a communal sauna. It was how I decompressed, and I enjoyed it enough that the frustrations started to matter: sometimes it was too busy, sometimes I'd arrive and it was closed. The habit was solid; the logistics weren't.
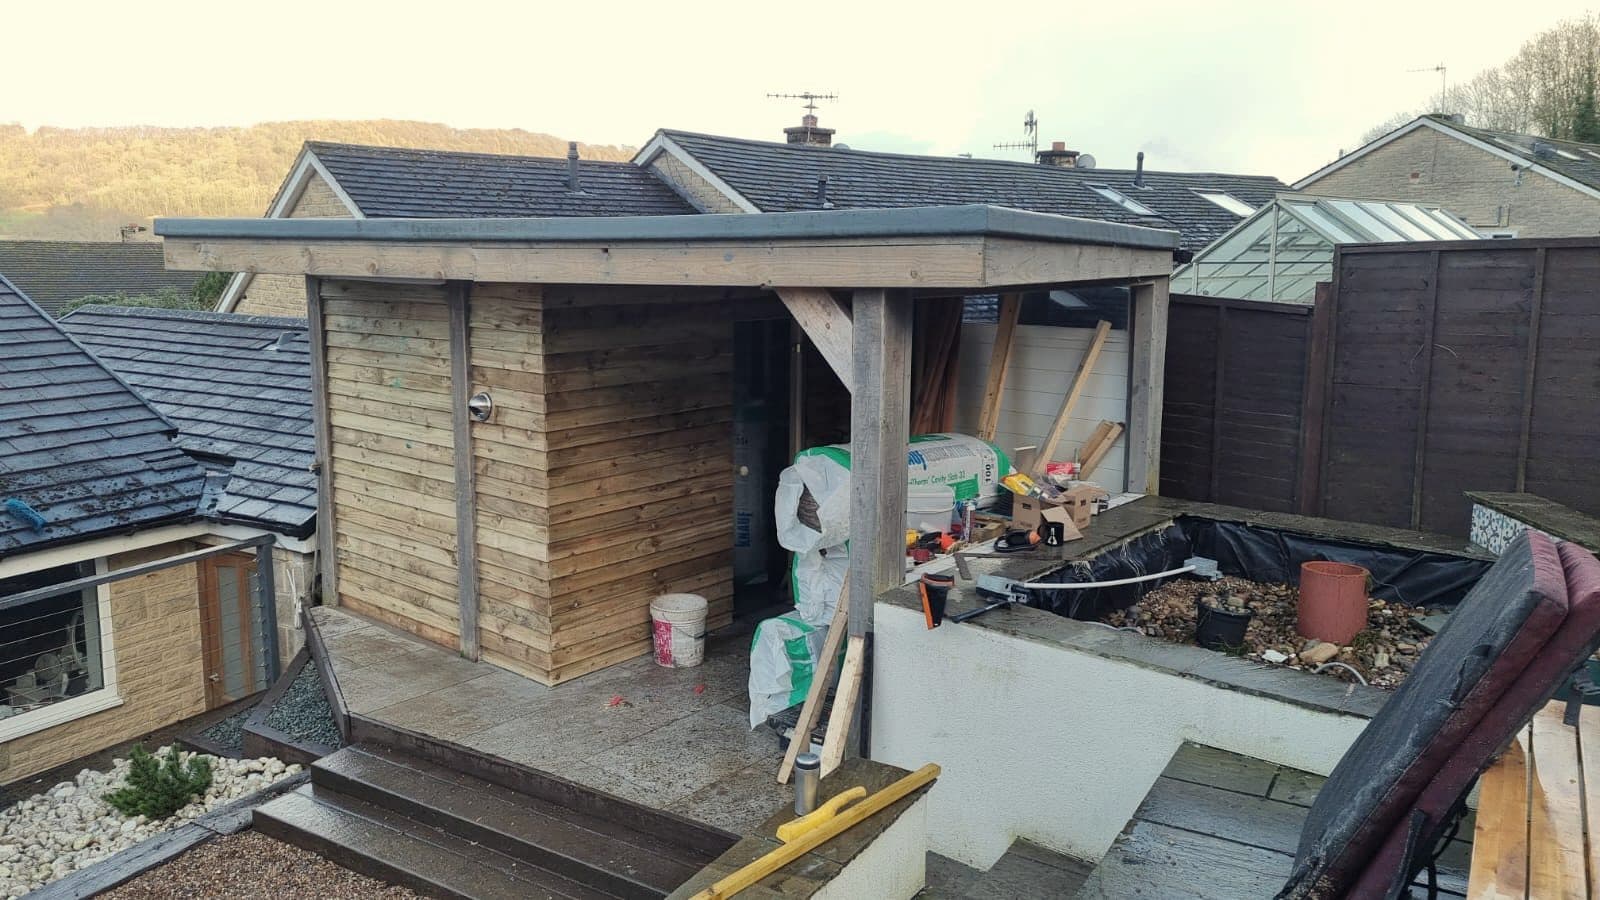
The push came from my wife. At the top of our garden stood a gazebo nobody used — with a very good, and expensive, flat roof, which is exactly why we'd never been willing to just take it down. Her suggestion joined the dots: you like sauna, the structure's sitting there, converting it would add value to the house and make the outside space earn its keep. It's still the best product decision anyone has made about this household. The sauna also finished a bigger rethink of that end of the garden — the old pond on the top side came out entirely, filled in and gone, which is why the mid-build photos show its lined bed beside the frame.
Keeping the frame
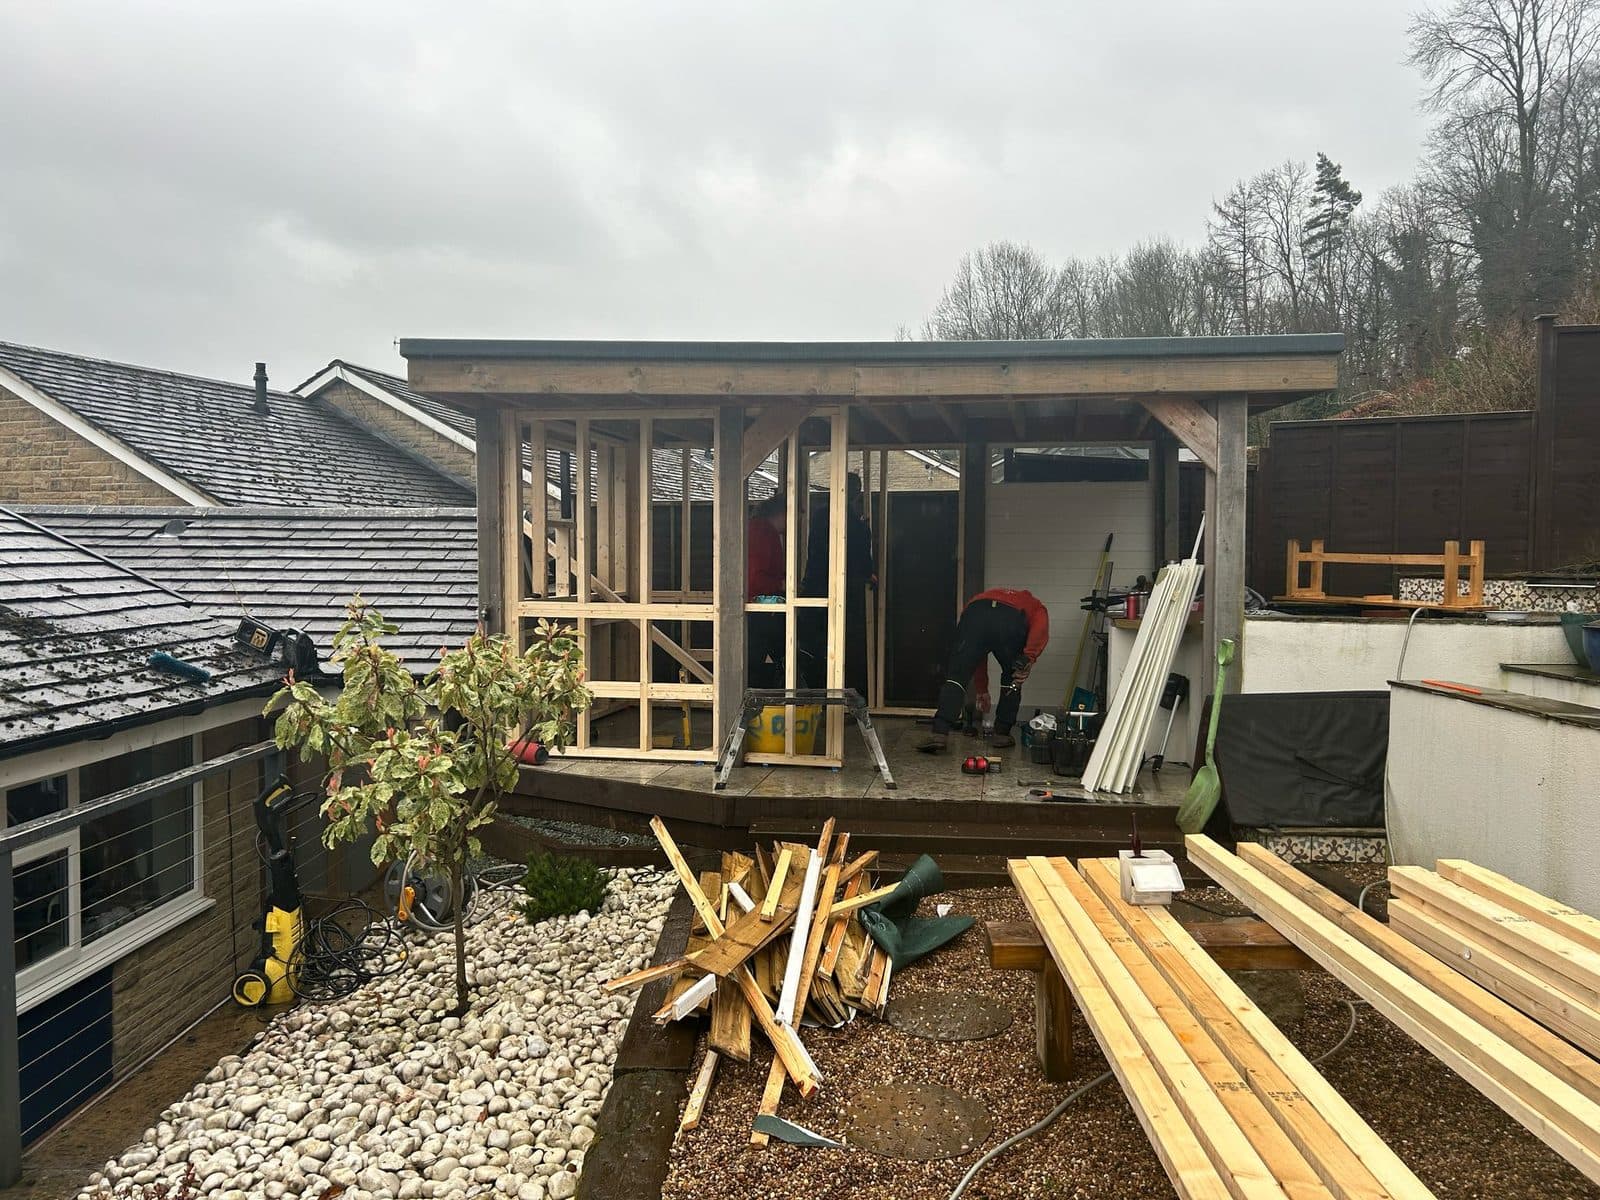
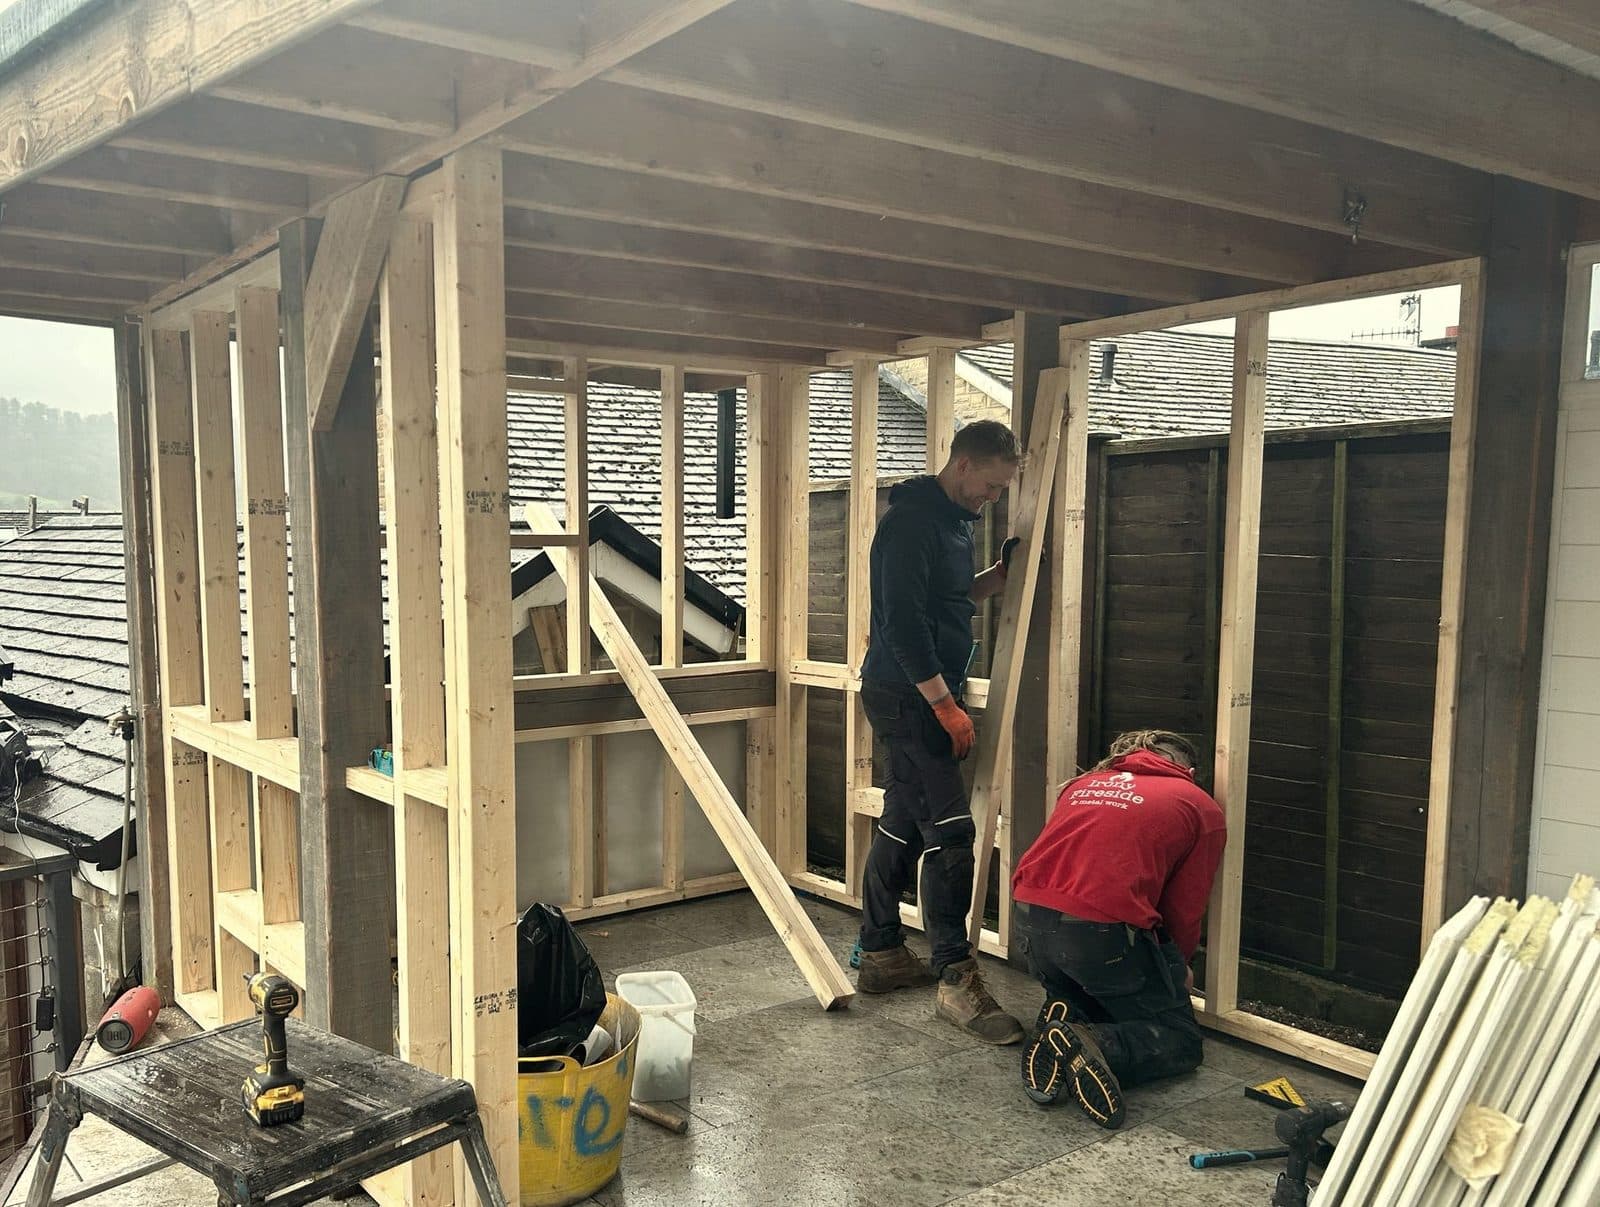
The decision that shaped everything else was keeping the structure. Rather than demolish and start again, Irony Fireside — a Matlock builder listed in this directory; they were not paid for this mention and did not ask for it — worked with the existing frame and built to spec inside it. A conversion sets your dimensions for you: the footprint, the roof height and the covered end were all decided the day the gazebo went up, years before the sauna was an idea. What that bought in return was speed. The whole conversion took about two weeks.
The best advice came from their side too: make it bigger than we thought we wanted. We did — it seats six or seven across two bench levels — and put in a larger stove than the space strictly needs. Nobody has ever regretted the extra room.
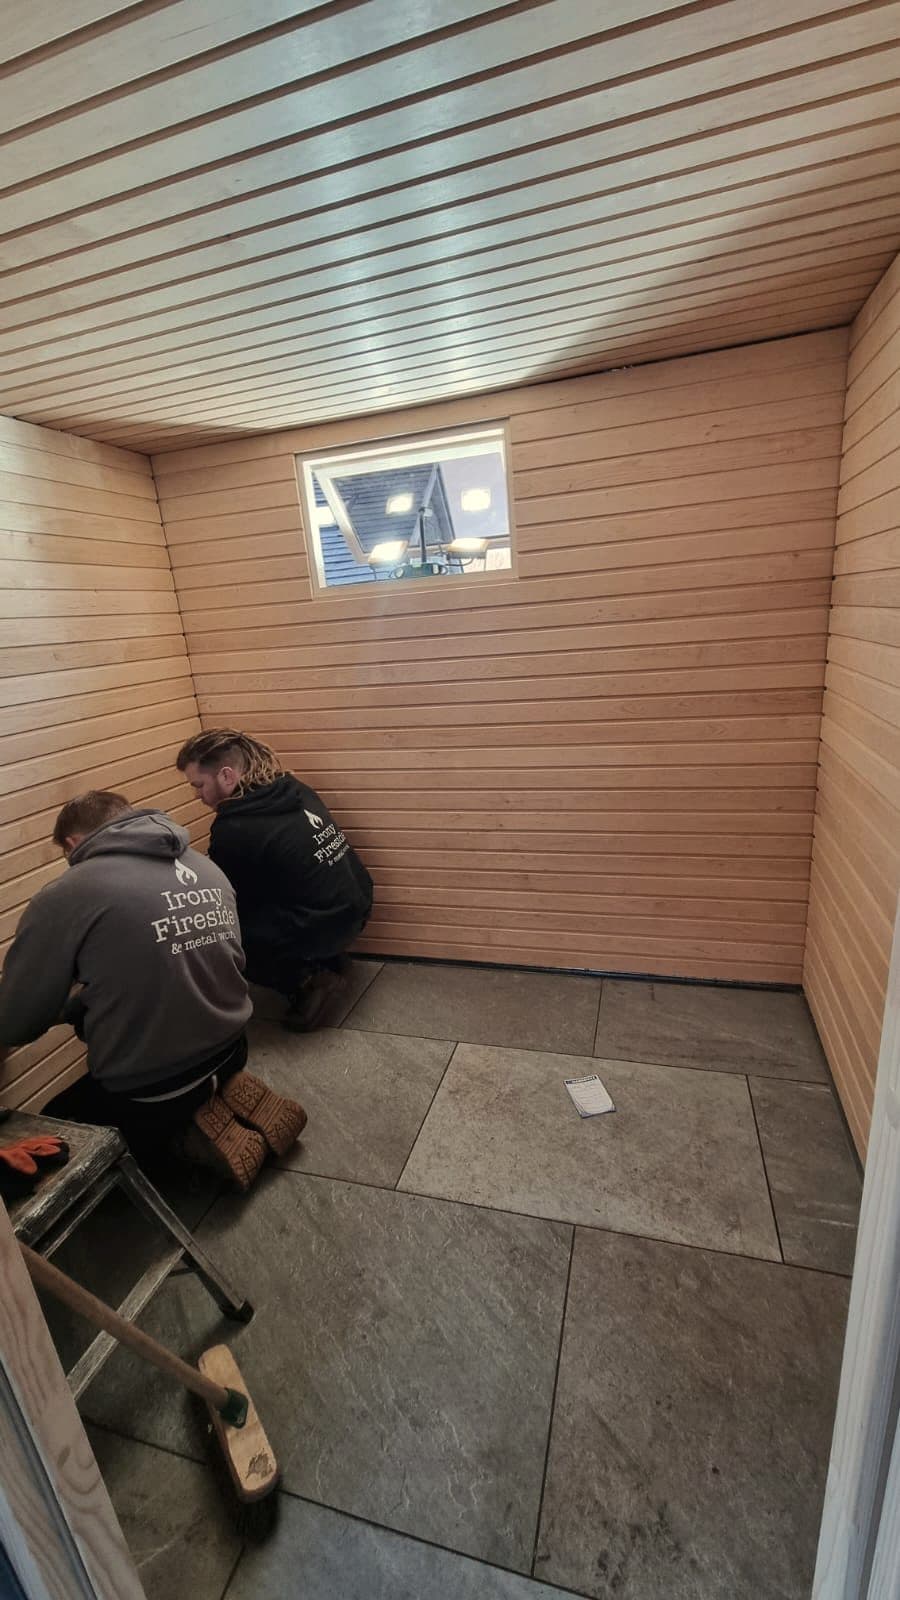
The floor is the conversion's quiet win. When the gazebo was originally built I'd tiled it rather than laying patio slabs — a slightly smoother but grippier tile — and the sauna went straight down onto it. There's no insulation underneath, so it stays cool underfoot; that sounds like a defect and lives like a feature, because the room above is so well insulated it holds its heat regardless, and a cool floor under hot feet is one of the small pleasures of the place.
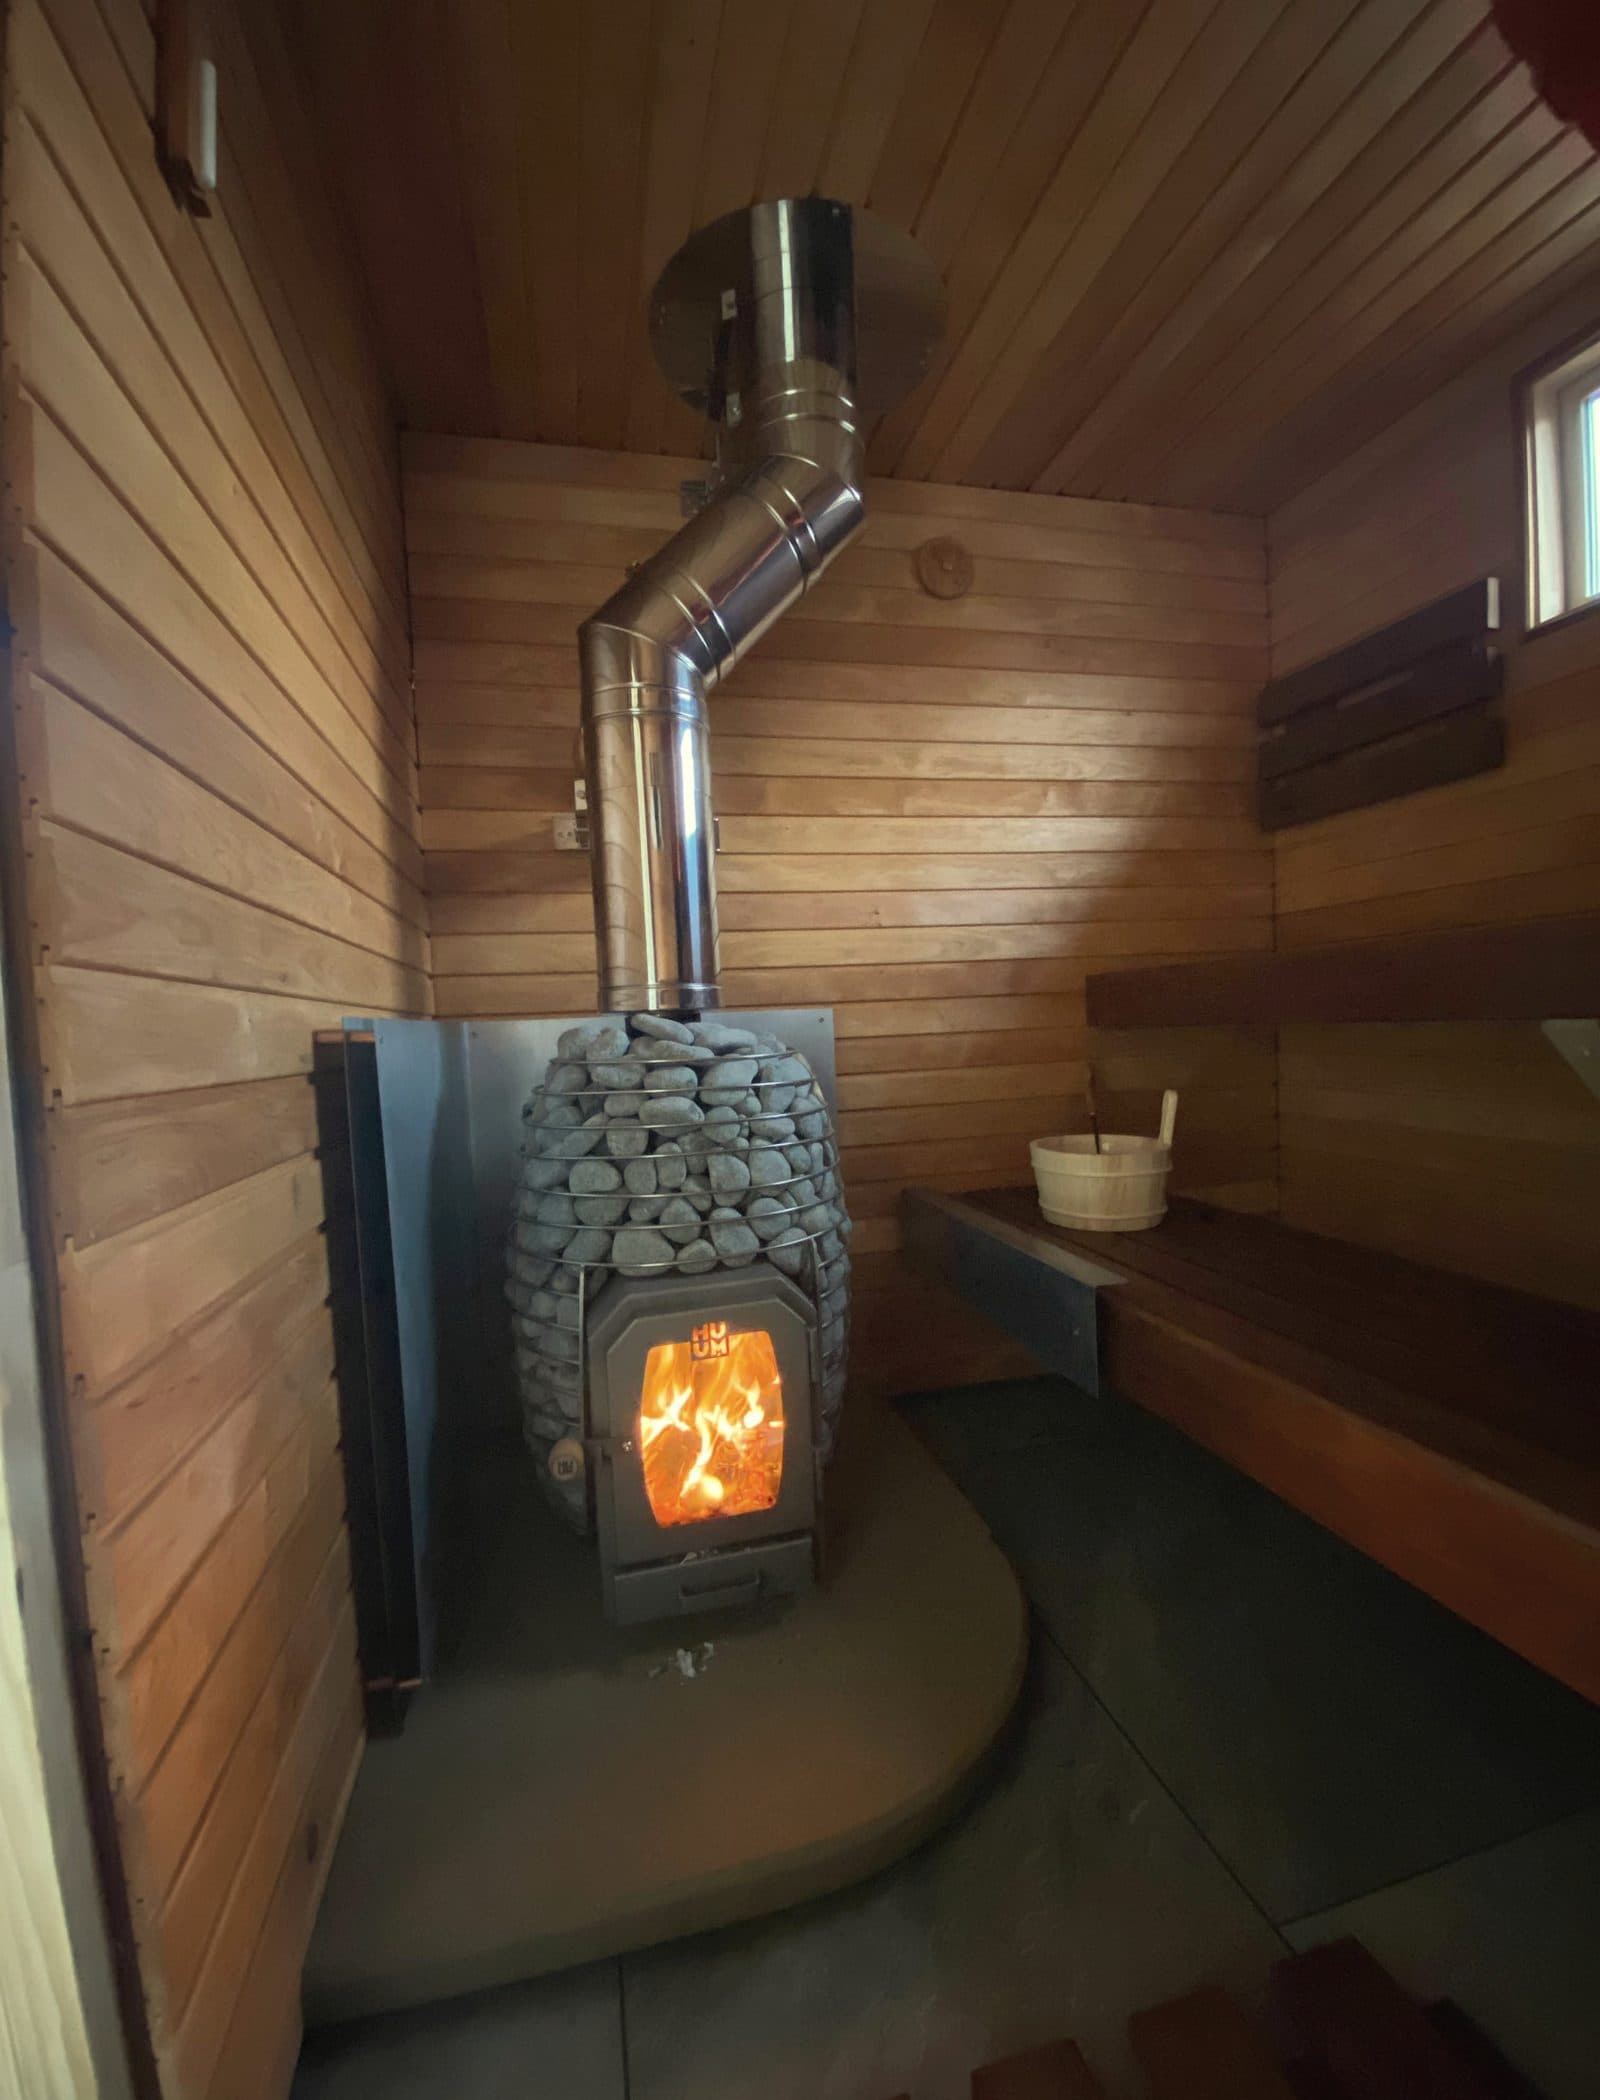
On the stove we looked seriously at Narvi too, but the HUUM Hive won on looks and a recommendation — and the stone-caged firebox has since earned its place as the thing every first-time guest photographs.
Two weeks, honestly photographed
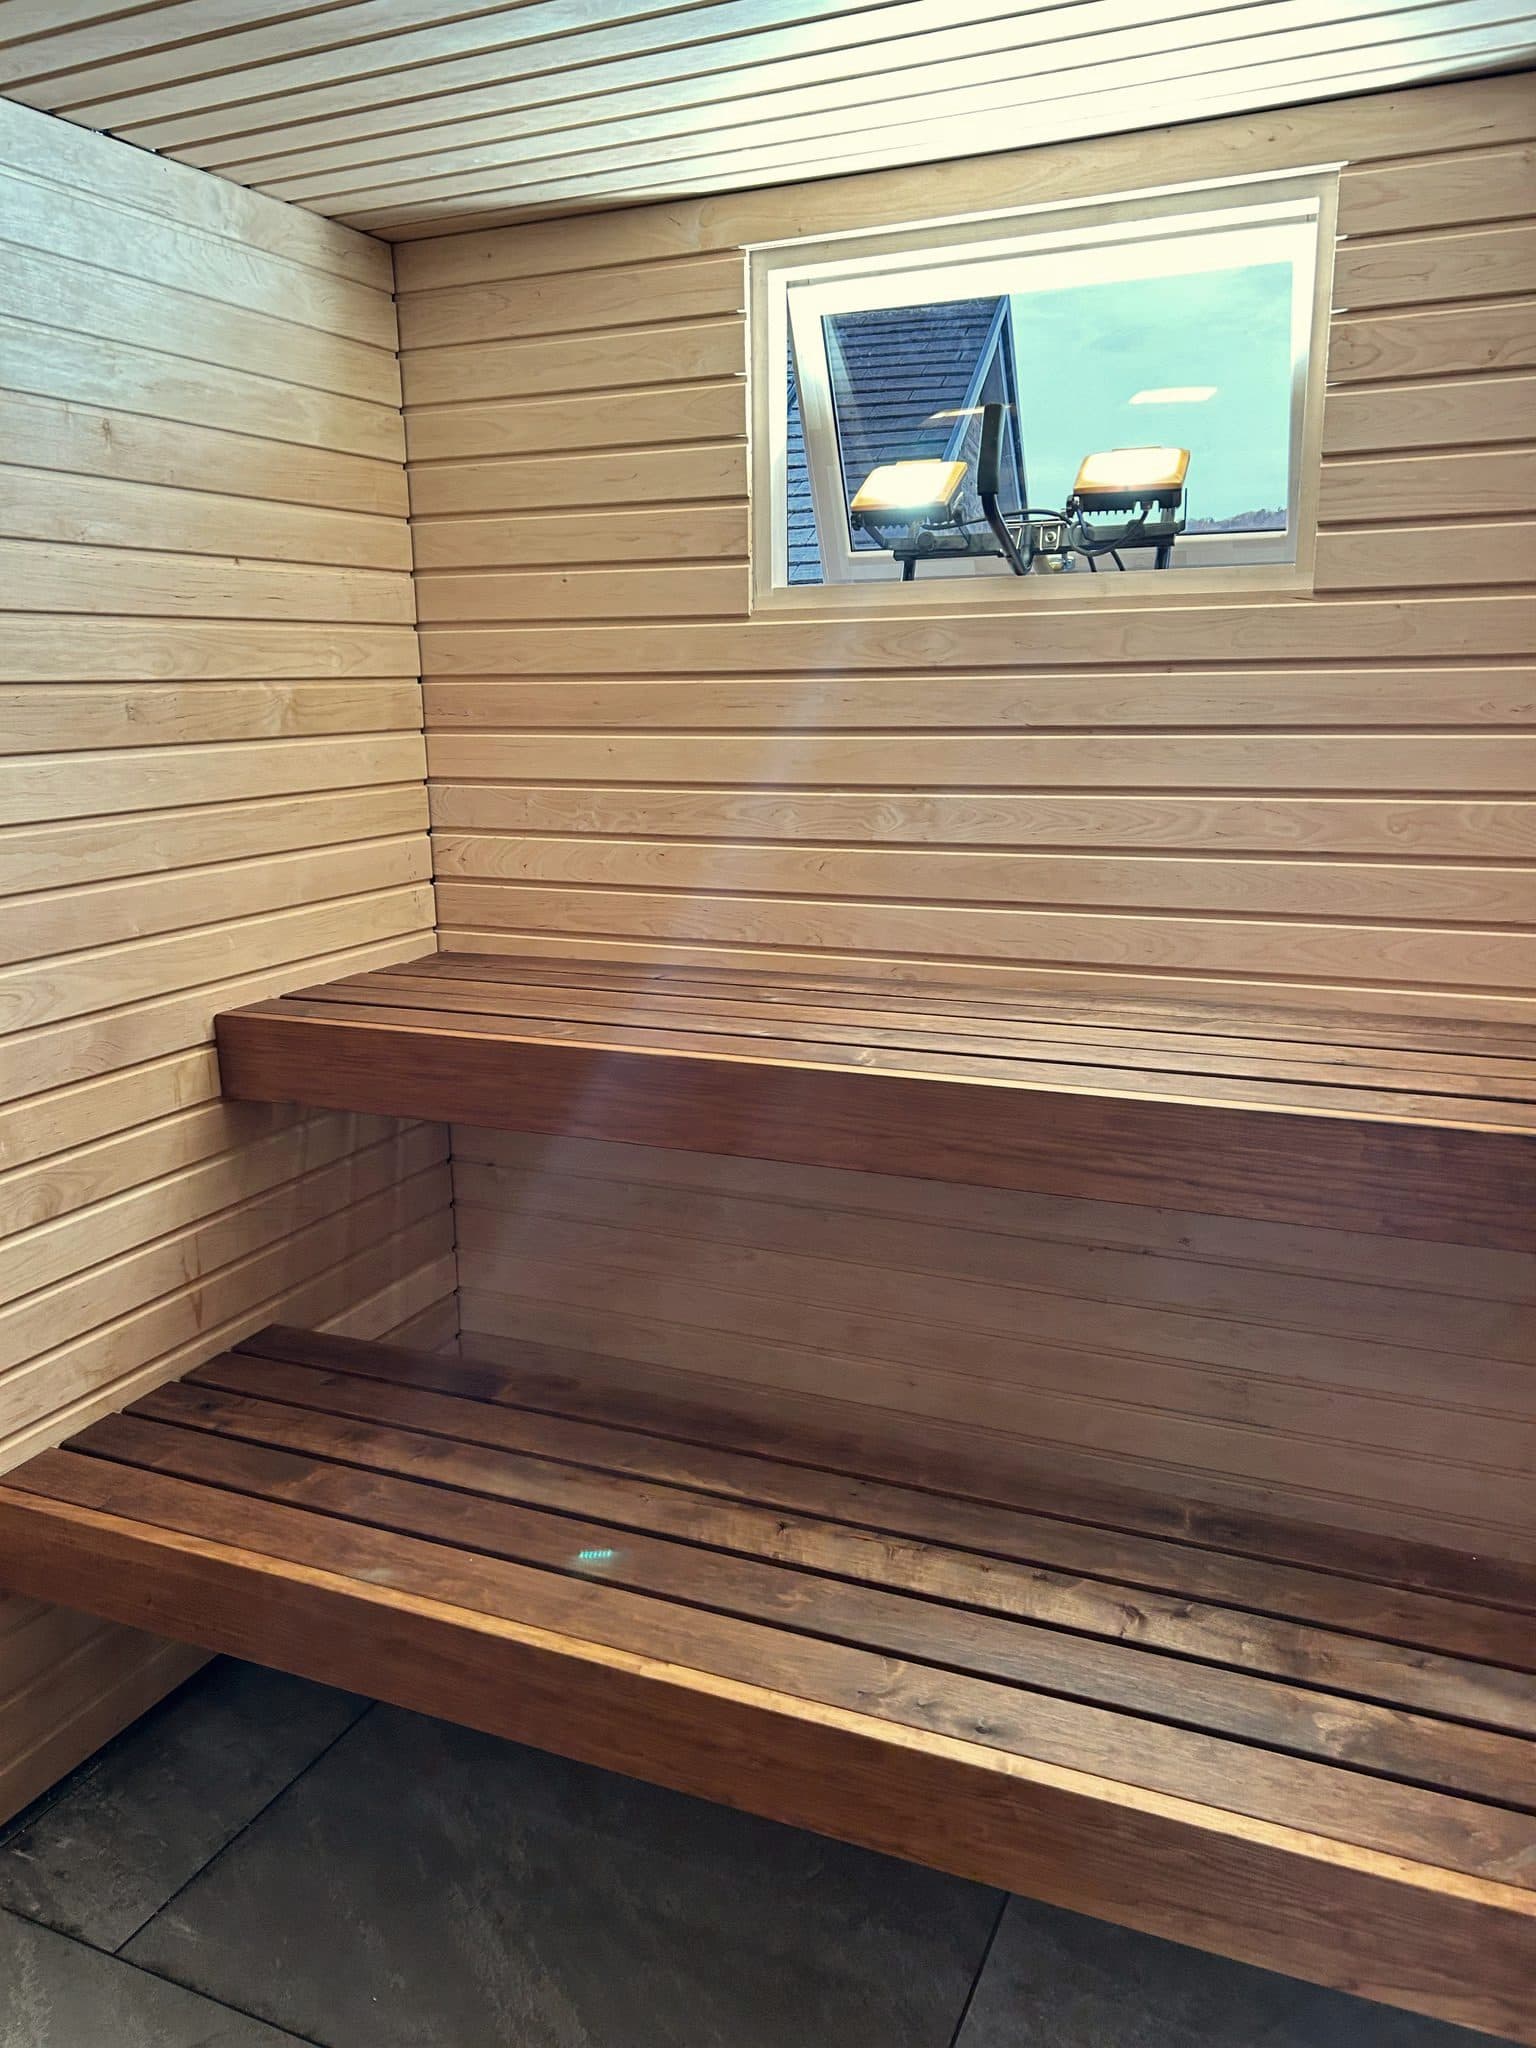
The photos tell the sequence, including the weather. The frame was stripped back and reworked in the rain. Insulation went between the studs, new cladding over the outside, and the interior lined in aspen — the pale, low-resin timber used in saunas because it stays comfortable against bare skin — over a floor that was already there. Two tiers of dark-stained benches went in, and a window was set into the back wall looking out over the Peak District hills — the view you steam to. Electrics and lights went in. Somewhere in the cladding the builders set a small copper disc stamped with their name — their way of signing the work.
The details the photos reward looking for: the stove stands on a dark stone hearth with a steel heat shield behind it, and the twin-wall flue takes a dogleg offset before it exits the roof. The back window is a proper opening unit rather than a fixed pane — ventilation as well as the view. Outside, a round bulkhead light sits on the cladding, and the copper shower rose hangs under the roof edge, fed by the exposed copper run along the eaves.
The kit, for anyone specifying their own
Knauf DriTherm cavity slab in the walls, the HUUM Hive wood-burner sized above the room's needs, twin-wall stainless flue, copper pipework to the outdoor cold shower, and the original fibreglass flat roof retained — with one honest complication. Cutting the flue through a GRP roof and resealing it is specialist work; a roofer came in to do that one job properly, and it hasn't leaked since. None of these links are paid or affiliate — they are simply what was used.
What it cost
Almost nobody publishes this, so here is a real one. The conversion was quoted in February 2025 at £10,530 including VAT, covering insulation and internal framework, the aspen cladding, ventilation to specification, two benches, the door and the window, the stove pipe and associated fittings, the hearth and heat shield, and the stones for the stove. The stove itself sat outside that figure — the builder's guide at the time was roughly £1,000 to £1,600 depending on size and style — as did a small accessories bundle at £100 for a bucket and ladle, thermometer, timer and felt hats. The roofer's flue work and the electrics were separate again.
Read that as one real quote for a conversion into an existing frame, not as a market rate. The structure, the expensive roof and the tiled floor were already paid for years earlier, which is exactly why the conversion made sense; a new build starts from a different place. For the wider picture, our guide to what a sauna costs in the UK sets out the ranges.
Living with it
The finished unit is more than the hot room. The covered end became a big wood store — we deliberately chose a large one, and it completes the whole thing practically as well as visually. A cold shower was plumbed in outside, and a Lumi plunge tub sits by the steps — though honestly, the cold shower is the one I reach for. The full hot-cold circuit happens in a few paces without going indoors.
In the time since, the running score is short. The door has needed adjusting a few times — timber doors on a hot box warp and settle with the seasons, and that is part of ownership. One cold snap burst the outdoor shower's pipework, which is now lagged — plumb an outdoor shower like the exposed pipe run it is, not like a bathroom. Care is undemanding: a deep clean roughly once a month, a brief brush-down between times, and after a session it simply gets closed up with the door left slightly ajar — sometimes the back window opened too — so the room dries itself out. That's the whole maintenance story: one adjustment, one lesson in lagging, one roofer.
What actually changed is the using of it. Four or five sessions a week now. It has more or less replaced Friday-night drinks as the way the week gets closed out, and because we sized it for company, sauna evenings with friends have become a thing we do. The gazebo went from the deadest space on the property to the focal one.
How we run it
A session is usually two or three fifteen-minute stints with the cold shower between them, and the wind-down happens in a swing chair on the deck. There's a wood rising behind the house, so the soundtrack is birdsong and the view runs up into the trees — best of all as the sun goes down. My preference is a hot sauna — around 100°C. Early on we ran an experiment to see what the stove could do and hit 125°C, which I'll say plainly was a bit stupid and not something to repeat; what it mostly taught me was respect for the stove, and that building a good sauna fire is a skill in its own right — a future article. Accessories come from Finnmark these days; the fragrance oils too, after a spell buying from Holland & Barrett convinced me authentic sauna oils are worth the difference. My taste runs to the wood-and-earth end of the shelf — terva, the Finnish pine-tar scent, and the Emendo range. Sauna hats live on the hooks, used less often than they should be.
What I'd tell anyone considering the same
First, an unused structure in the right spot can beat a catalogue — the frame and that roof were the slow, expensive parts, and ours already existed. Second, listen when the builder says go bigger; the marginal cost of size at build time is small, and the capacity is what turned a private habit into a social one. The details that matter most are invisible in the finished photos — insulation depth, the flue through the roof, ventilation — which is why I used a specialist builder rather than doing it myself.
The first fire is the photo I keep coming back to. Everything else — this directory, the guides, the whole site — followed from sitting in that heat and wanting to know where else in the UK does this properly.